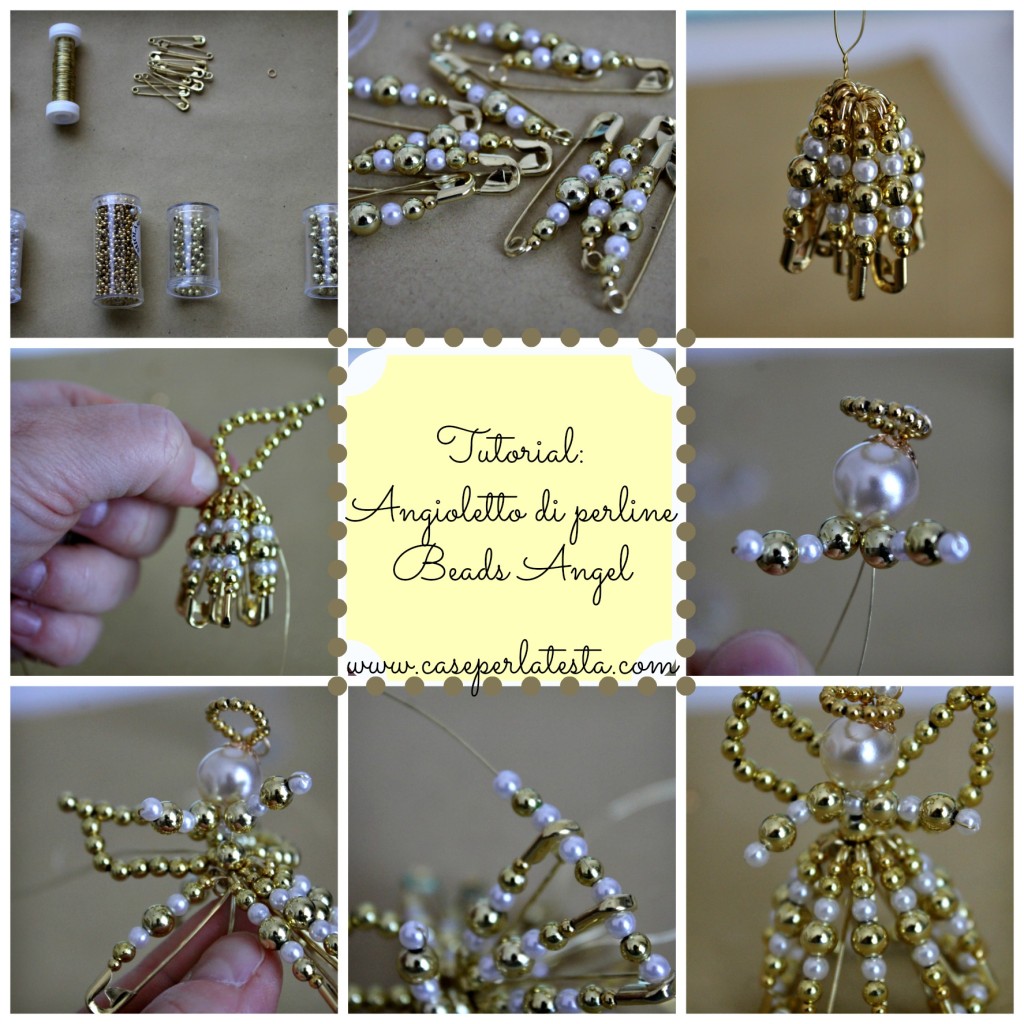
Oggi vi riproponiamo, dopo averlo rivisto e arricchito, il tutorial per fare un angioletto di perline. Siamo molto felici di poter condividere con voi questo tutorial, è così divertente fare gli angioletti di perline! … e allora cosa aspettate? tutte a fare angioletti da mettere sull’albero di Natale, come segnaposto per la tavola di Natale, come regalo per una persona speciale: gli angioletti di perline sono così belli che ogni occasione è buona per metterli in mostra! Mettetevi comode questo sarà un post mooolto lungo!
Finally we made it! We have prepared a tutorial on how to make angels of beads: we are very happy to share it with you! … and then what are you waiting for? let’s all make angels to put on the Christmas tree, as a placeholder for the Christmas table, or as a gift for someone special: angels beads are so beautiful that every occasion is good to show them! Grab a cup of tea, this will be a very looooong post!
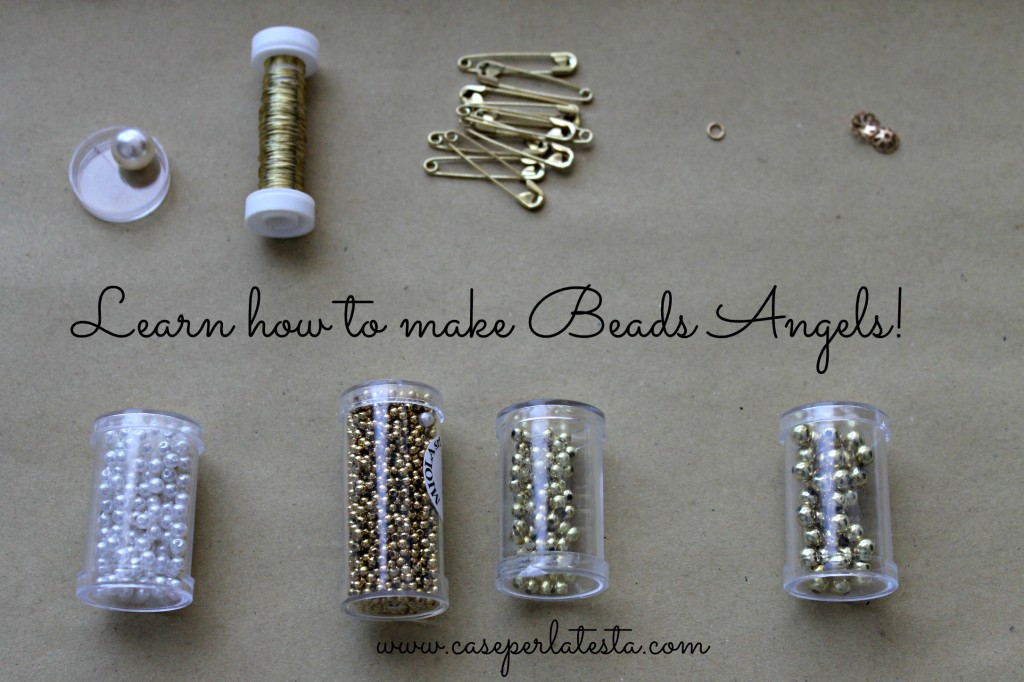
1 perla bianca 14 mm per la testa
1,5 m di filo di ferro color oro diametro 0,4 mm
10 spille da balia color oro misura 2 per il vestito
1 anellino d’oro per appenderlo
1 chiudi collana in oro (cappellino)
1 campanella piccola (opzionale)
35 perle bianche 4 mm
24 perle oro 3 mm
16 perle oro 6 mm
76 perle oro 3 mm
Materials:
1 white pearl 14 mm for the head
1.5 m golden wire diameter 0.4 mm
10 safety pins gold color size 2 for the dress
1 gold ring for hanging
1 close necklace in gold (hat )
1 small bell (optional)
35 white pearls 4 mm
24 gold beads 3 mm
16 gold beads 6 mm
76 gold beads 3 mm
Come fare: How-to:
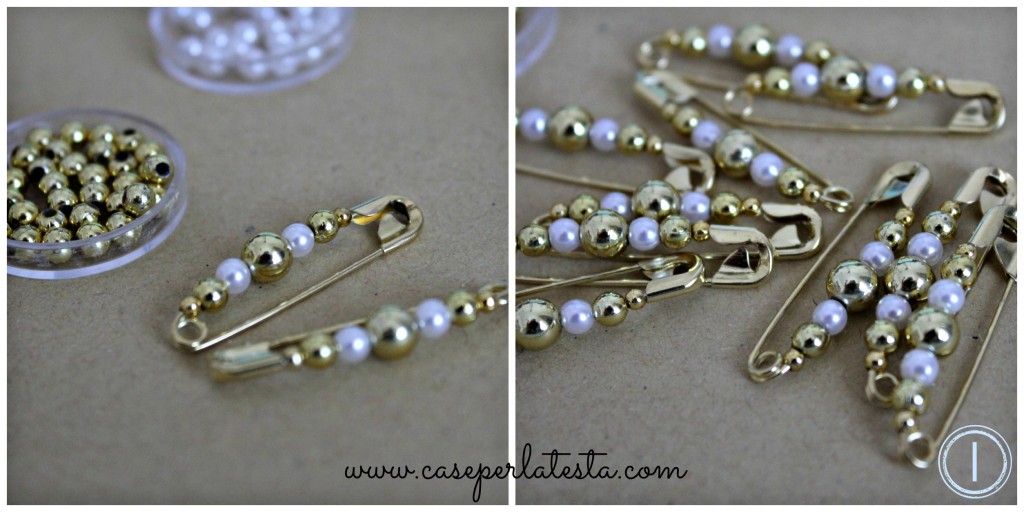
- Infilare in ogni spilla da balia 1 perla oro 3 mm + 1 oro 4 mm + 1 bianca + 1 oro 6 mm + 1 bianca + 1 oro 4 mm + 1 oro 3 mm. Chiudere la spilla e stringere con una pinza la testa della spilla per far si che non si apra.
Tuck into each safety pin 1 gold bead 3 mm + 1 gold 4 mm + 1 white pearl +1 gold 6 mm + 1 white + 1 gold 4 mm + 1 gold 3 mm. Close the pin and tighten with pliers the head of the pin to make sure that doesn’t open.
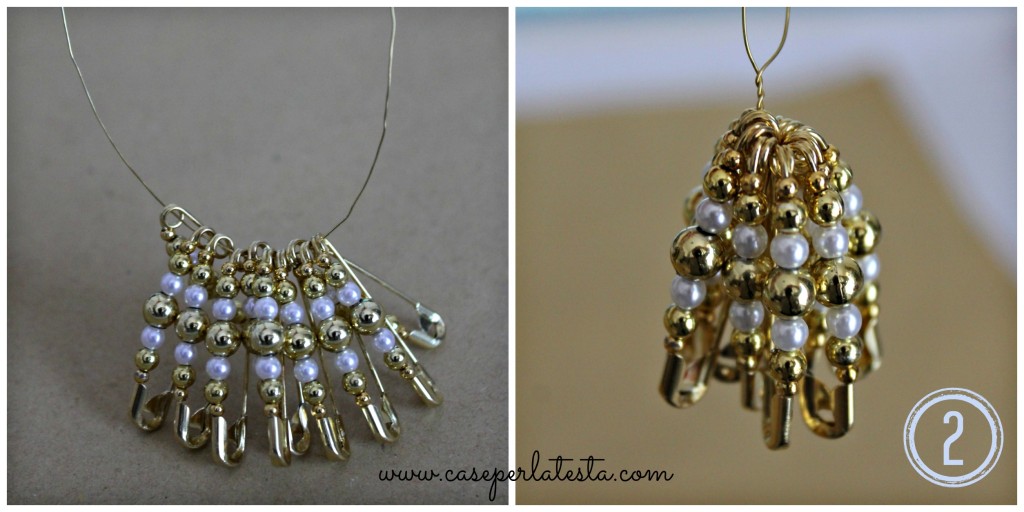
- Tagliare circa 40 cm di filo e infilare le spille da balia di coda tutte dallo stesso lato, portarle a metà del filo, stringerlo e attorcigliarlo in modo da fissarle bene. E così abbiamo fatto il vestitino.
Cut about 40 cm of wire and slide the safety pins to queue all from the same side, bring them to the middle of the wire, tighten and twist in order to fix them well. And so we made the dress.
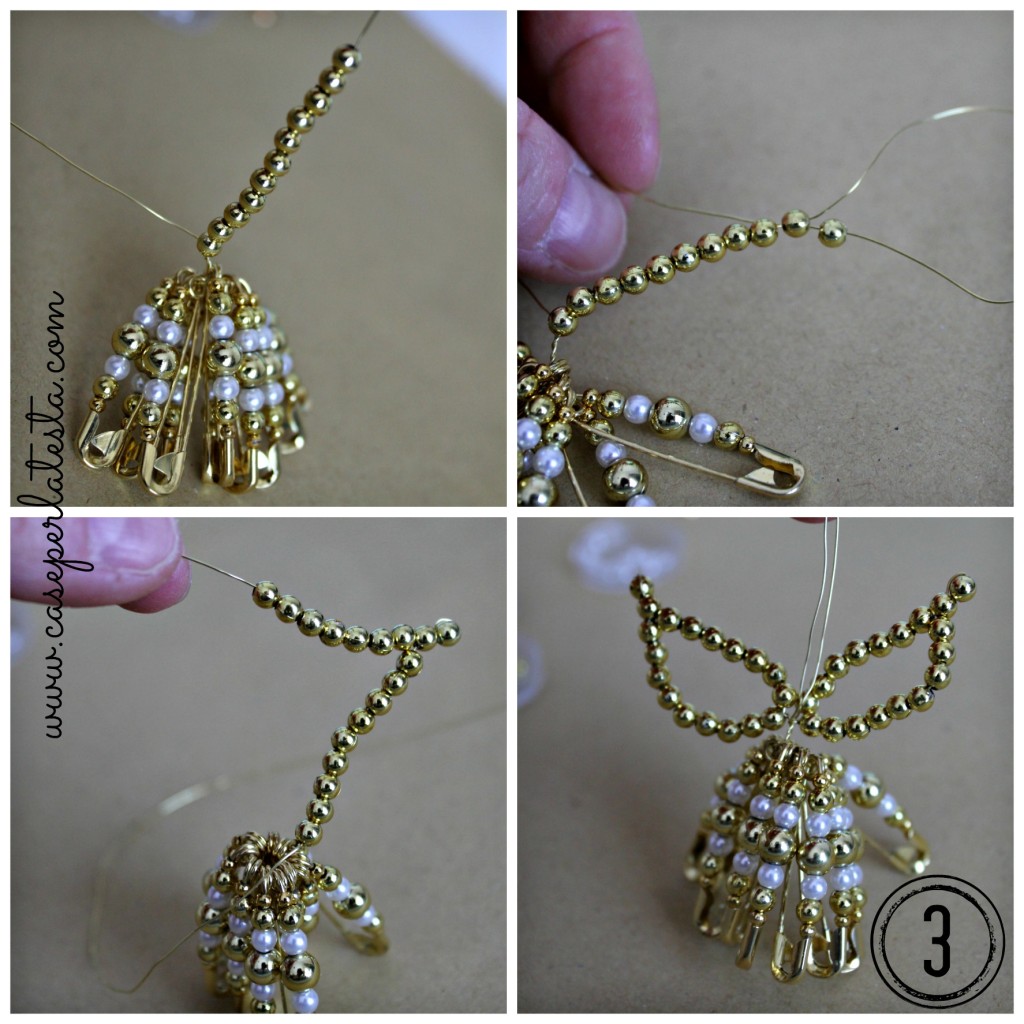
- Formare le ali infilando su ciascun filo separatamente 11 perle oro 4 mm, saltare l’undicesima e ripassare nella decima e tirare forte (oppure attorcigliare su se stessa l’undicesima perlina): così otterremo la punta dell’ala. Poi infilare 7 perle oro 4 mm e chiudere le ali con due giri di filo all’estremità.
Form the wings sticking out of each wire separately 11 gold beads 4 mm, skip the eleventh and repass in the tenth and strong pull (or twist on itself the eleventh bead) so we’ll get the end of the wing. Then tuck 7 gold beads 4 mm and close the wings with two turns of wire at the end.
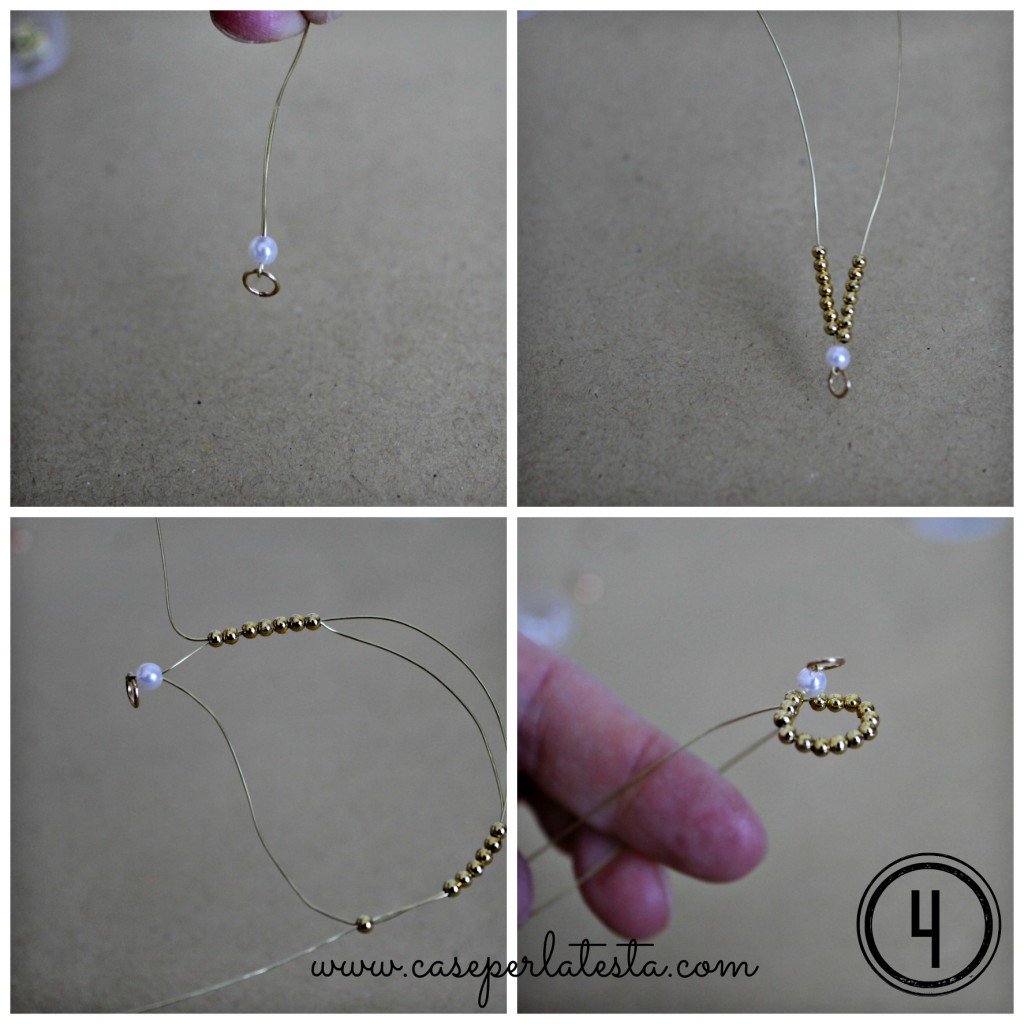
- A metà di circa 50 cm di filo infilare l’anellino d’oro; infilare entrambe i fili in una perla bianca e infilare poi su ciascuna estremità 7 perle oro 3 mm e ripassare dentro le perline incrociandole, così abbiamo fatto l’aureola.
In the middle of about 50 cm of wire, thread the gold ring, put both wires in a white pearl and then put on each end 7 gold beads 3 mm, and wipe inside the beads crossing them, so we make the halo.
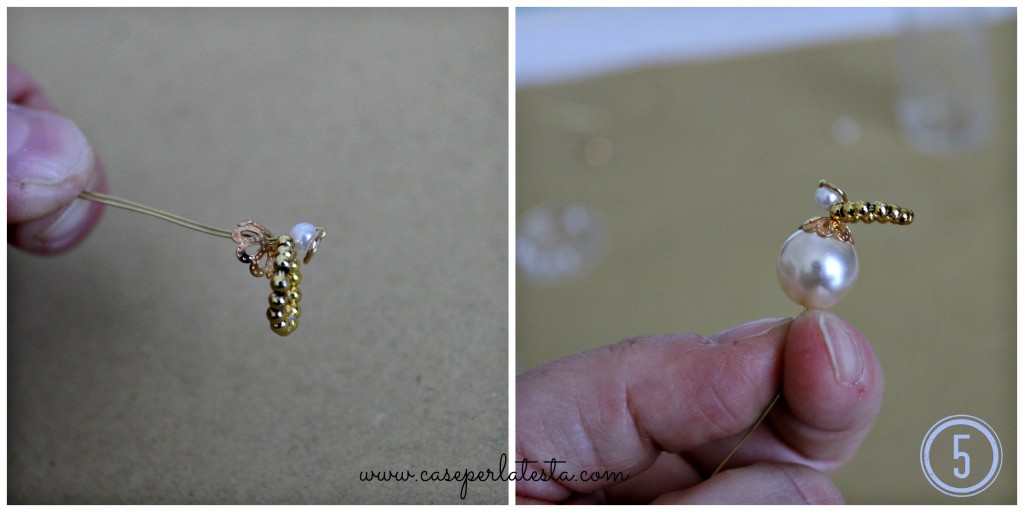
- Riunire i fili e infilarli nel cappellino con il lato convesso verso l’aureola e poi nella perla bianca grande, otteniamo così la testa.
Gather the wires and insert them into the hat with the convex side toward the halo and then in the big white pearl, so we get the head.
- Separare i fili e su ciascuno infilare 1 perla oro 6 mm1 perla bianca 1 oro 6 mm 1 bianca, saltare e ripassare il filo nel buco delle altre 3 (e abbiamo fatto le braccia).
Separate the wires and put on each 1 gold bead 6 mm, 1 white, 1 gold bead 6 mm, 1 white skip and go over the wire into the hole of the other 3 (and we did arms).
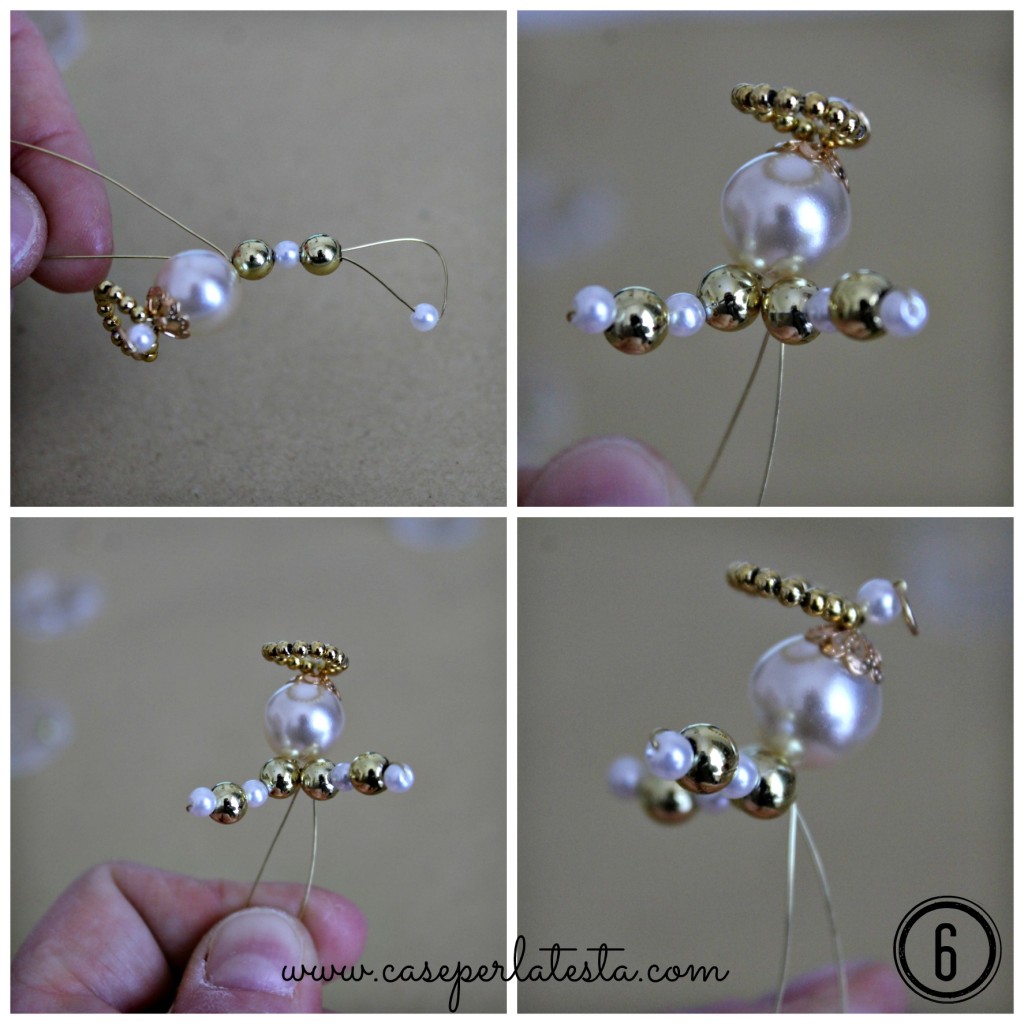
- Infilare su uno dei fili 1 perla bianca e ripassare con l’altro filo nella stessa perla intrecciando tirare forte i 2 fili per fissare.
Put on one of the wires 1 white pearl and wipe with the other wire in the same pearl, pull the 2 wires to secure.
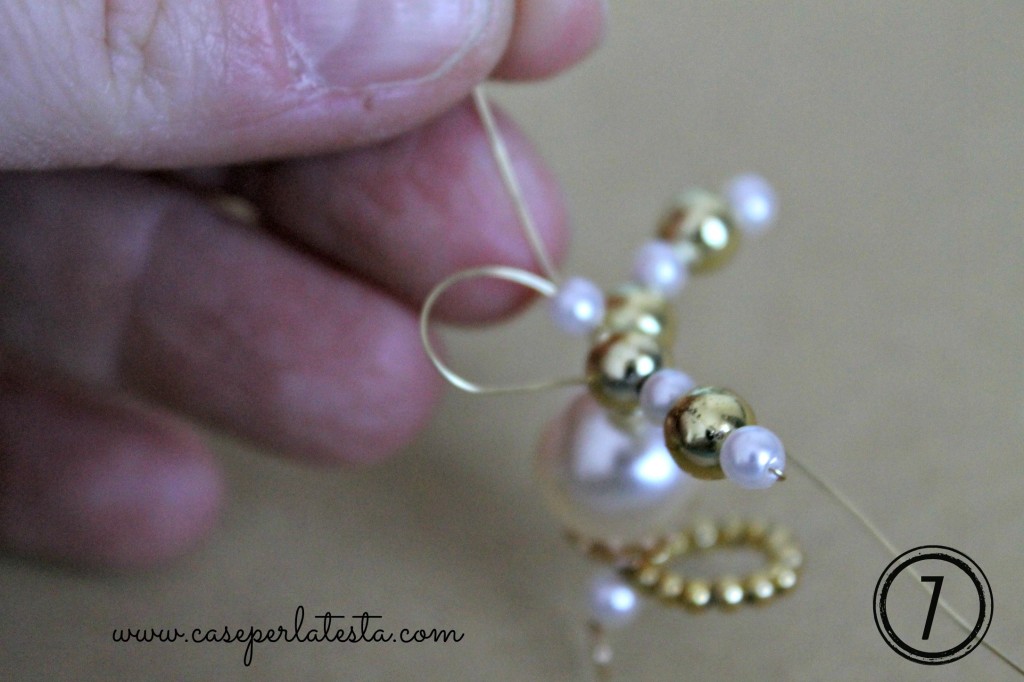
- Infilare entrambe i fili in una perla oro 6 mm e poi nel buco stretto del vestito
Insert both wires into a gold bead 6 mm and then in the hole of the dress.
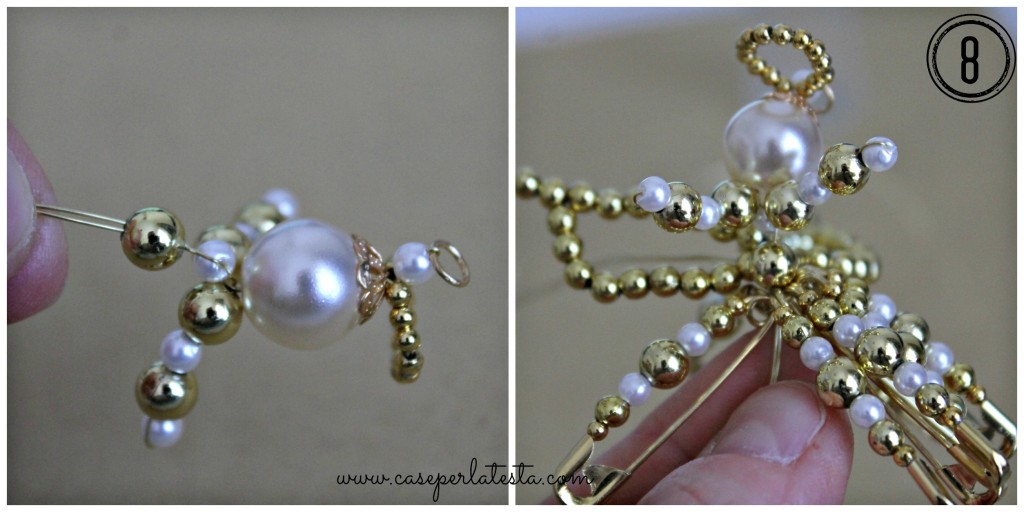
- Infilare su in solo filo 1 perla oro 6 mm, spingerla bene sotto il vestito per fissarla, attorcigliare i fili e tagliare.
Put up in only one wire 1 gold bead 6 mm, push it well under the dress to secure it, twist the wires and cut.
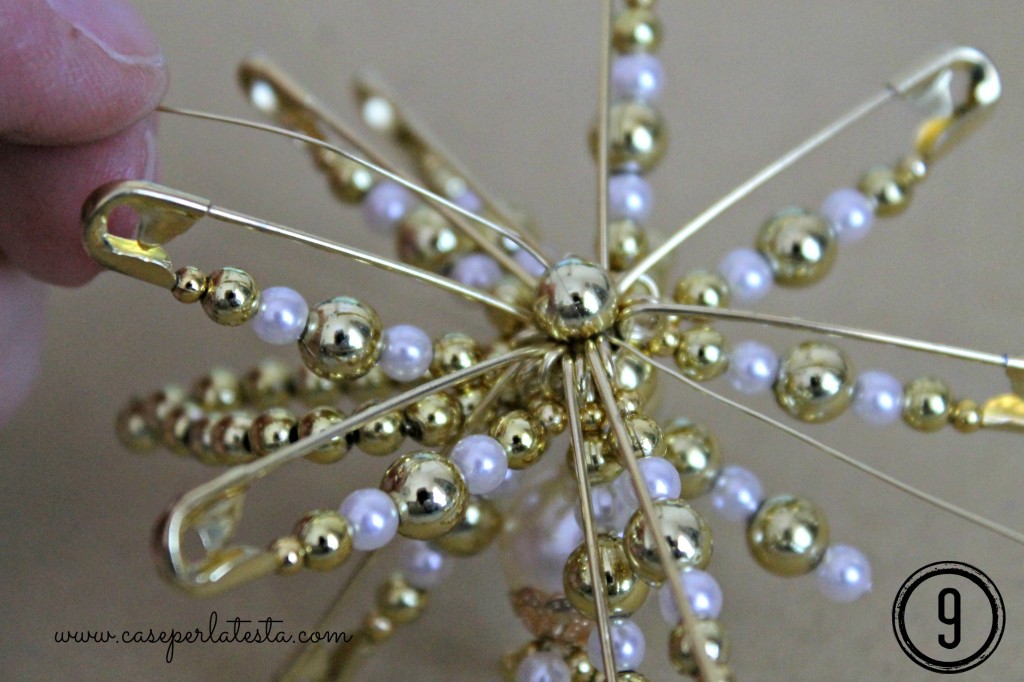
- Tagliare 20 cm di filo e infilare le spille da balia intervallate da 1 perla bianca 1 oro 4 mm 1 perla bianca.
Cut 20 cm of wire and thread safety pins interspersed with 1 white 1 gold 4 mm 1 white.
- Chiudere a cerchio, tirando bene, attorcigliare il filo e tagliarlo. Così abbiamo finito il vestitino.

Close to circle, pulling well, twisting the wire and cut it. So we finished the dress.
Se si vuole mettere un campanellino all’interno dell’angioletto, al punto 9, dopo la perla oro 6 mm, attorcigliare per fissare al vestito e, prima di tagliare, infilare il campanellino, stringere, attorcigliare e tagliare.
If you want to put a bell inside of the little angel in Section 9, after the gold bead 6 mm, twist to secure the dress and before cutting, thread the bell, tighten, twist and cut.
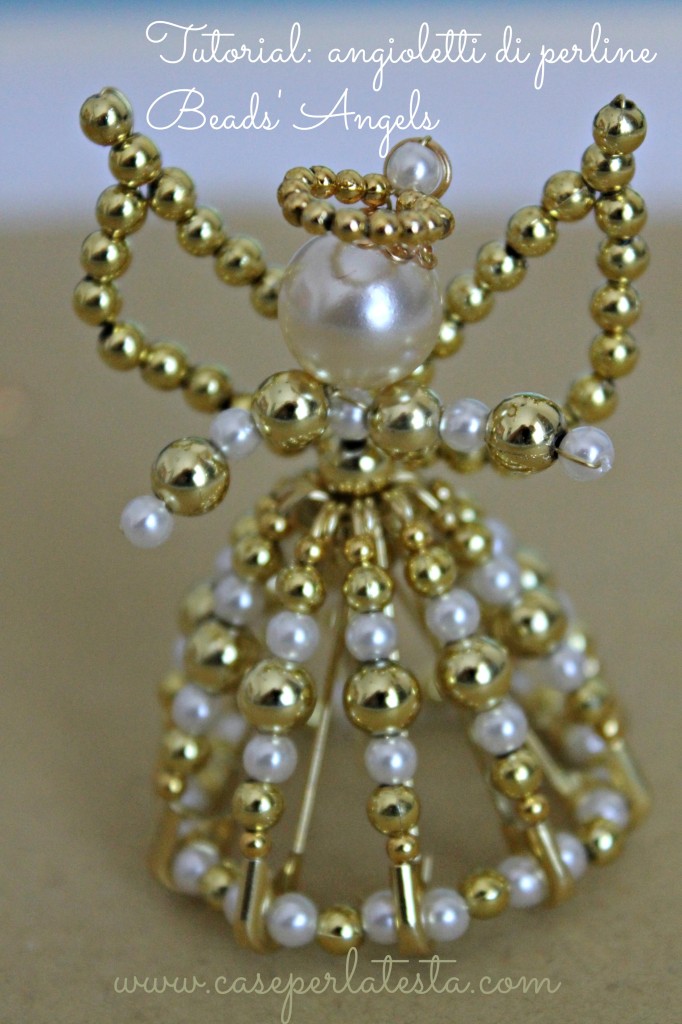 Si possono fare angioletti con tutti i colori, anche con le spille da balia acciaio, ovviamente. Provate a fare gli angioletti di perline, scegliete i vostri colori, è divertente e sono bellissimi! Se ci mandate le foto pubblicheremo le più belle!
You can make angels with all the colors, even with steel safety pins, of course.
Try to make the angels , choose your colors, it’s fun and they are beautiful!
If you send us photos, we will share them!




2 Comments
Emanuela @ My Little Inspirations
Dicembre 1, 2014 at 6:05 pmSono un po’ laboriosi da realizzare, ma molto belli…mi sono salvata il tutorial e magari riuscirò a farli anch’io! Grazie!
Caseperlatesta
Dicembre 2, 2014 at 9:24 amIn effetti non è un decoro velocissimo da realizzare, però una volta fatto il primo, gli altri si fanno più velocemente, e la resa è notevole! Grazie del tuo commento!