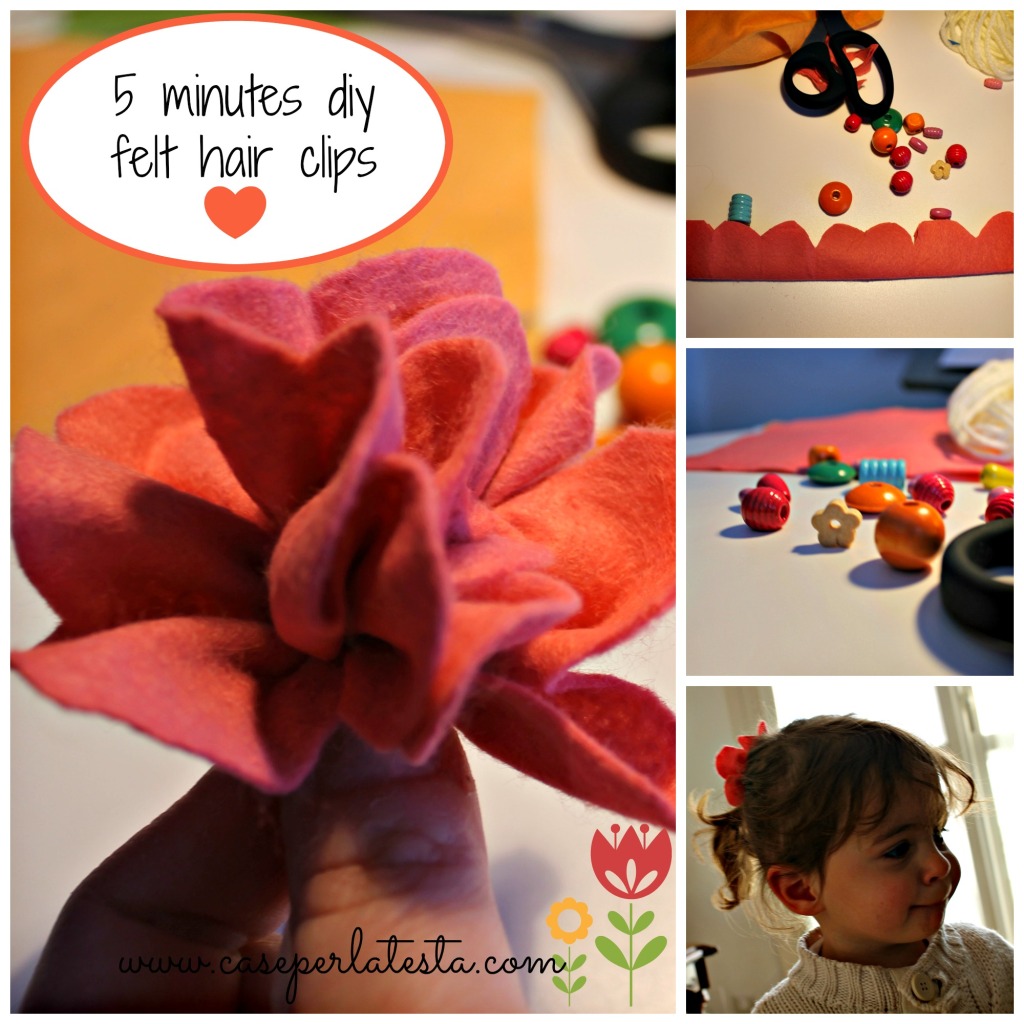
Se anche voi avete una baby birba come la nostra Miss B, che pur non avendo ancora 2 anni, è più femminile di Jessica Rabbit e adora vestiti, scarpe, borse, mollette ed elastici (e davvero non ci spieghiamo da chi abbia preso!), allora questo progettino velocissimo e low cost è per voi!
Non è facile legarle i capelli, che adesso iniziano a essere davvero lunghetti, per convincerla abbiamo provato a fare un elastico con un fiore in feltro: è stato un successo!
E’ talmente semplice e veloce fare un elastico con un fiore in feltro, ci vanno non più di 5 minuti!

If you too have an hurricane baby as our Miss B, who is not yet two years old, but is most feminine than Jessica Rabbit and loves clothes, shoes, bags, clothes pegs and elastic (and really we can’t imagine from who this love derives!) then this little project quick and low cost is for you!
It is not easy to tie her hair, now begin to be really longish, so to convince her we tried to make a rubber band with a flower in felt: it was a success!
It ‘so easy and quick to make a rubber band with a felt flower, it takes not more than 5 minutes!
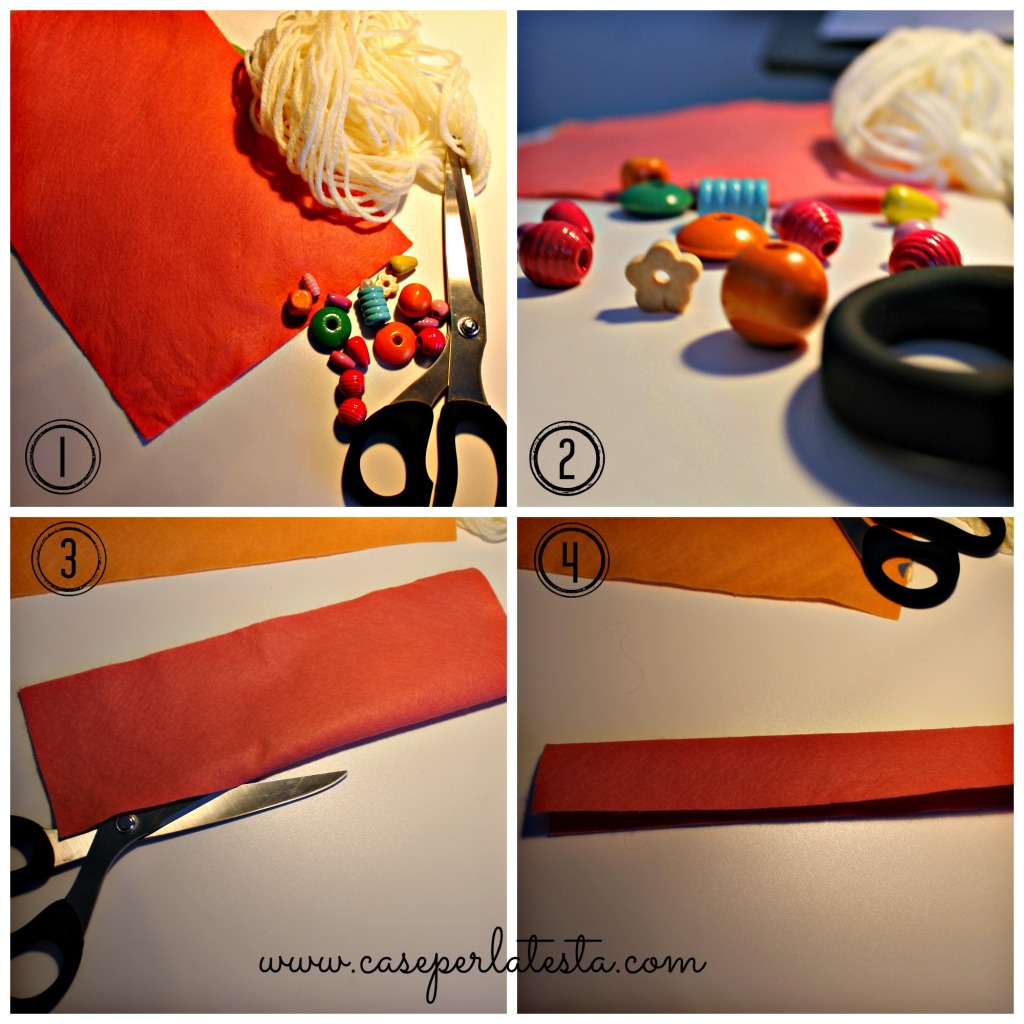
Ecco cosa serve: del feltro leggero nel colore che più piace, lana, forbici, elastico o molletta, eventualmente delle perle in legno colorate.
Come fare, seguendo le immagini:
1 – 2 – 3 tagliare il feltro in un rettangolo di dimensioni 7 cm x 30 cm;
4. piegalo in due nel senso della lunghezza;
5 – 6 ripiegalo in due nel senso dell’altezza e poi altre due volte, fino a ottenere un quadrato. Tenendolo ben fermo con una mano, con l’altra ritaglia i bordi a semicerchio arrotondandoli;
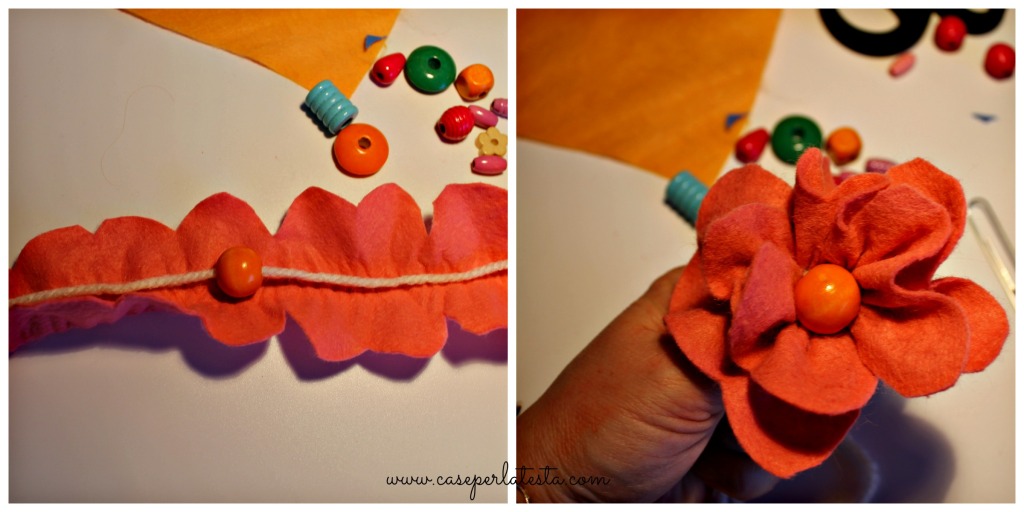
7 apri il feltro e fai passare un filo di lana di circa 45 cm di lunghezza nel centro. Ripiega di nuovo il feltro nel senso della lunghezza;
8 tenendo fermo il feltro tira i due capi del filo di lana e poi fermali con un nodo, e poi taglia il filo in eccesso. A questo punto puoi legarlo a un elastico oppure fissa il fiore di feltro a una mollettina con un punto di colla a caldo. Fatto!
Se vuoi, puoi creare il pistillo del fiore facendo passare una perla di legno nel filo di lana posizionandola al centro del feltro e poi prosegui come dal punto 4.

Here is what you need: felt, wool, scissors, elastic or clips, wooden beads.
How to following images:
1 – 2 – 3 Cut the felt in a rectangle of size 7 cm x 30 cm;
4 fold it in half lengthwise;
5-6 fold it in two in height and then two more times, until you get a square. Holding it firmly with one hand, with the other crops the edges to be rounded semicircle;
7 open the felt and put a wire wool of about 45 cm in length in the center. Fold back the felt lengthwise;
8 while holding the felt, pull the two ends of the wool and then fix them with a knot, and then cut the excess wire. At this point you can tie it to a rubber band or sets the felt flower in a small clips with a dot of hot glue. That’s it!
If you want, you can create the pistil of the flower by passing a wooden beads in wool yarn placing it at the center of the felt and then continue as from the point 4.

28 Comments
Amy | Canary Street Crafts
Febbraio 13, 2015 at 2:14 pmThis is so cute, and your model is adorable!
Caseperlatesta
Febbraio 13, 2015 at 3:29 pmThanks Amy! The model thanks you too!!!! Have a great week end!
Linda Rose
Febbraio 14, 2015 at 12:16 pmE’ troppo carino questo elastico! Ci credo che Miss B sia contenta di indossarlo 😀 Complimenti!
Linda
Caseperlatesta
Febbraio 14, 2015 at 12:26 pmGrazie! Si, Miss B è già fashion addicted a meno di due anni!
Norma
Febbraio 17, 2015 at 2:27 pmMa che carine!
E sono anche facili da fare
Ciao
Norma
Caseperlatesta
Febbraio 17, 2015 at 3:16 pmGrazie Norma! Sono facilissime in effetti! A presto! ciao!
Kyla @HouseofHipsters
Febbraio 18, 2015 at 11:49 pmCute! Cute! Cute! Thank you for linking up with Found & Foraged!
Caseperlatesta
Febbraio 19, 2015 at 9:20 amThanks Kyla! Thank you for hosting this lovely linky party!
LISA
Febbraio 19, 2015 at 2:07 pmBellissimo fermacapelli e facilissimo da realizzare…. io sono rimasta colpita dalla modella… che bella bimba!!!!!!
Complimenti
Lisa
Caseperlatesta
Febbraio 20, 2015 at 9:10 amGrazie Lisa! E un grazie ancora maggiore per i complimenti alla piccola modella! Sarà felicissima! A presto!
María y María Inés
Febbraio 20, 2015 at 10:27 amQue bonitoooo! Nos encanta!
Y también para usar en decoraciones.
Que paséis un feliz finde!
Muchos besos de las dos
Caseperlatesta
Febbraio 20, 2015 at 10:46 amGracias! Tenemos un proyecto en mente para utilizarlo como decoración de Pascua! Feliz finde e besitos!
Leo
Febbraio 20, 2015 at 11:00 amVery cute! I think this would be a great craft for my little niece! 😉
Buen fin de semana!
Bsos
Leo
Caseperlatesta
Febbraio 20, 2015 at 5:14 pmGracias Leo! Feliz fin de semana! Besos
Menchu
Febbraio 20, 2015 at 11:27 amMe parece precioso este prendedor para el cabello, además, puede dar muy buen resultado en otros trabajos, es muy versátil.
Muchas gracias por el paso a paso!!
Disfrutad el finde, besitosss!!
Caseperlatesta
Febbraio 20, 2015 at 5:16 pmGracias! Yes, this craft could be made in different materials & for different uses! Feliz finde! Besos!
Soluciones para el Hogar y el Amor
Febbraio 20, 2015 at 9:27 pmHello Iky Sisters!
Hurricane Miss B looks lovely with your beautiful flower project, have a nice weekend, xoxo
Caseperlatesta
Febbraio 24, 2015 at 9:15 amGracias Pilar! Your comments is really lovely! Have a great week, dear! Besitos!
marcela de Colorin Colorado
Febbraio 22, 2015 at 12:22 amI don’t know what I love more: today’s idea or the little model!!!
Caseperlatesta
Febbraio 24, 2015 at 9:16 amThanks Marcela! You’re so lovely & kind! Have a wonderful week! Besitos
Silvia de Silmariñecas
Febbraio 22, 2015 at 1:36 amQué bonitos y fáciles.
Gracias por compartir. Besitos frugales
Caseperlatesta
Febbraio 24, 2015 at 9:16 amGracias Silvia!, feliz semana! Besos!
Tauna
Febbraio 23, 2015 at 8:19 amThis is so cute! And simple enough I might actually be able to do it. 🙂 Pinning and featuring on tomorrow’s Mom2Mom Monday Link Up! http://www.proverbialhomemaker.com/tag/mom-2-mom-linkup
Caseperlatesta
Febbraio 24, 2015 at 9:17 amThanks Tauna! For your comment and also for featuring it! Have a great week!
Meaghan | Cook. Craft. Love.
Febbraio 24, 2015 at 6:18 amSo, so sweet! Thanks so much for linking up at Talented Tuesday!
Caseperlatesta
Febbraio 24, 2015 at 10:07 amHi Meaghan! Thanks for your comment and for your visit! See you at another great Talented Tuesday linky party! Kisses!
Emily @ Two Purple Couches
Febbraio 25, 2015 at 6:42 pmSo cute!! Great step-by-step instructions, too! Thanks for linking up at Creative Spark. Hope you’ll join us again today 🙂
Caseperlatesta
Febbraio 27, 2015 at 9:01 amHi Emily! Thank you for your comment and see you at another lovely Creative Spark linky party!